SerialEM Screening Standard Operating Procedure
1. Purpose
Successfully screen grids with SerialEM
2. Definitions:
2.1 SerialEM is a data collection software from UC Boulder
2.2 TEM UI is the microscope user interface located on the microscope PC
2.3 Autoloader Inventory is an automated procedure that identifies filled/empty slots in the cassette
3. Supplies & Equipment
3.1 Microscope
3.2 SerialEM
4. Procedure
4.1. Pre-screening Software and Microscope Checks
- TEM UI/Microscope PC:
- Confirm Autogrids are loaded
- Perform Autoloader Inventory
- Confirm SerialEM server is running
- Confirm 150µm C2 aperture is inserted
- SerialEM PC:
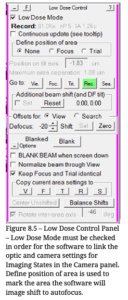
- Confirm “Low Dose Mode” is enabled
- Verify Imaging States are returning images:
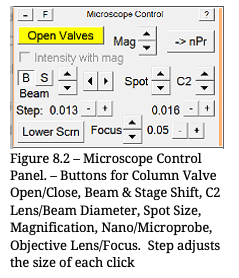
- Open Column Valves
- Press “Search” in Camera Panel
- Center stage over gridsquare
- Press “View”
- Press “Autofocus”
- Press “Record”
- If any of the Imaging States are in error, contact center staff for assistance.
4.2. Load Screening Grid
- You can load a screening grid either from the Microscope PC or the SerialEM PC
- TEM UI: Autoloader OCX: Click Slot, Click Load
- SerialEM: Menu: Script > One-Line Scripts : LoadCartridge # (1-12)
4.3. Collect Low Magnification Montage – Whole Grid Overview
- Open Column Valves
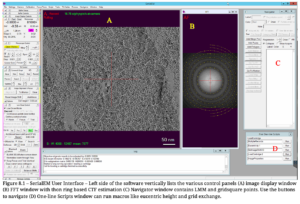
- Open Navigator window (Menu: Navigator > Open)
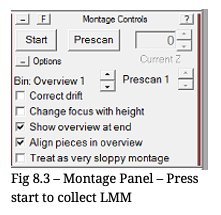
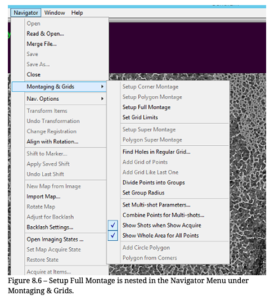
- Create and save LMM.mrc (Menu: Navigator > Montaging & Grids > Setup Full Montage)
- (optional) Find eucentric height of central gridsquare. (Menu: Tasks > Eucentricity > Rough Eucentric)
- Start montage collection (Montage Panel: Start)
4.4. Identify Gridsquares to Screen
- Identify at least two gridsquares to screen; one thick, one thin
- Left-click the center of a gridsquare and in the navigator window, press “Add Marker”
- Repeat for each gridsquare
- In the navigator window, select a gridsquare’s marker and click “Go To XY”
- Once the stage stops moving, acquire a View image
4.5. Screen Gridsquare and Acquire High Magnification Record Images
- Find eucentric height
- For AuFoil grids, center stage with partial gridbar for accuracy.
- Acquire View Image
- Center the stage over a hole (see 7.2 for procedural information)
- Adjust Autofocus Position (first gridsquare/once per grid)
- Low Dose Panel: Adjust Focus Position, select Focus
- View Image: Left-click focus area on support film between holes
- Low Dose Panel: select None
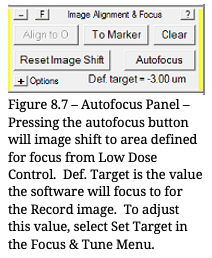
- Autofocus Panel: Click “Autofocus”
- (optional) Adjust Defocus target: Menu: Focus & Tune > Set Target (0 to -5.0µm)
- Camera Panel: click “Record”
- Save Record Image
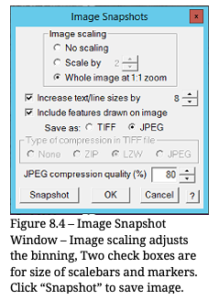
- Menu: Window > Save Image Snapshot
- Repeat on at least one hole from same gridsquare
- Navigate to next gridsquare of interest and repeat section 4.5
4.6. Save LMM with Targets/ Screened Squares
- Double click the LMM in Navigator window to load it
- Save Image Snapshot
4.7. Repeat for each grid, starting at 4.2
- Load next grid, acquire LMM, identify gridsquares, acquire and save high magnification images
4.8. Shutdown
- After screening is complete:
- Close Navigator Window
- Close all open maps with Menu: File > Close
- Close Column Valves, Load Grid 1 (Cross-Grating)
